Create custom templates for common Service Requests using the Templates option to allow for automated Workflow. This feature is included at no extra cost in Pro and Enterprise plans.
Enabling Templates
To enable Templates, you will need to turn this Advanced Feature on. This can be done by going to Settings > Account Payment> Add Ons. Then, locate the Templates option. Turn it on by checking the box and click Update Subscription.

Creating and Editing Service Request Templates
- Go to SETTINGS > Templates. This page will contain a list of your current Service Request Templates.

- This list includes Template Name, Template Summary, the Number of Service Requests set up under that template, Price of all Service Items in the template, and Actions.
- DEACTIVATE: Removes the template from your usable templates. When a template is deactivated, it remains in your system but is unable to be used. You can REACTIVATE at any time.
- CLONE: Creates a copy of the template to simplify creating similar templates.
- This list includes Template Name, Template Summary, the Number of Service Requests set up under that template, Price of all Service Items in the template, and Actions.
- Click CREATE TEMPLATE using the PLUS icon
- Fill in a Template Name and Template Summary
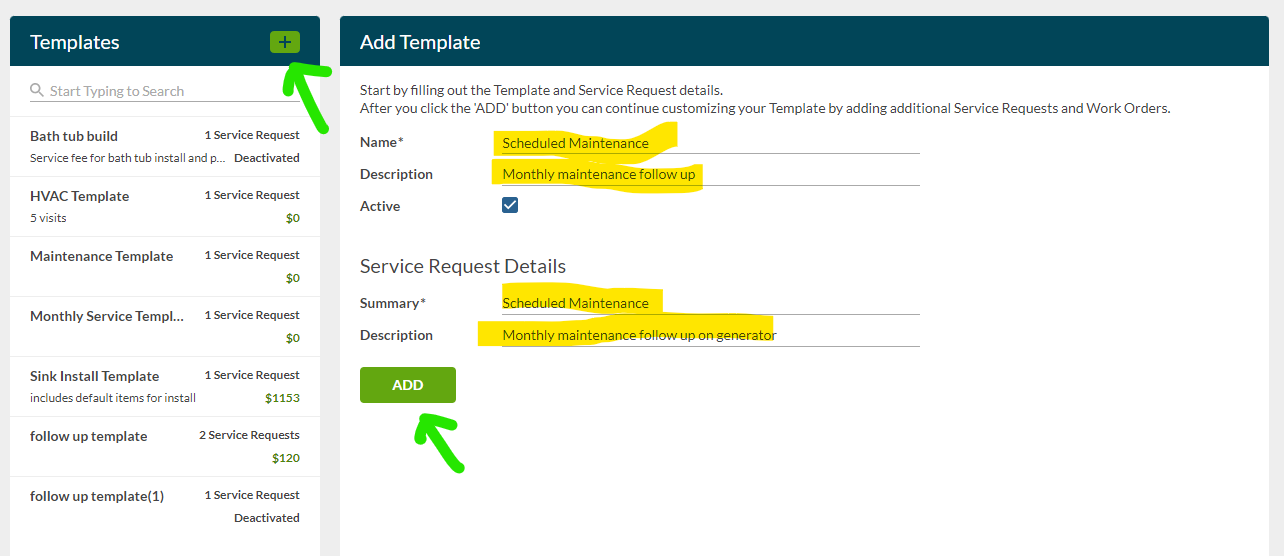
- Fill in a Summary and Description under Service Request Details
- Click ADD under Service Request Details
Now that we've created a Service Request for our Template, we can begin to add Notes and Work Orders to appear under that Service Request when using our Template.

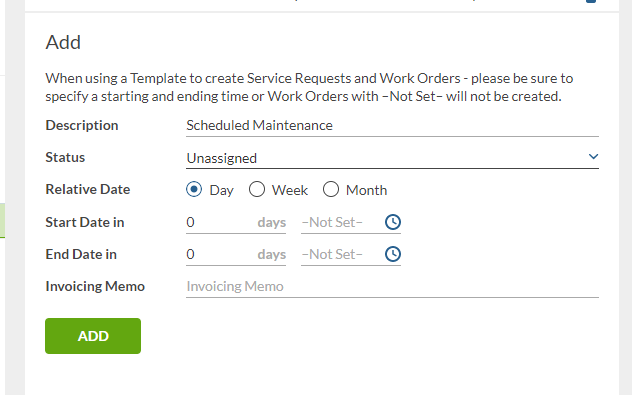
WORK ORDERS: As with any Service Request, you are able to set up as many Work Orders as you will need for this particular Service Request. To ADD a work order, click on the PLUS icon.
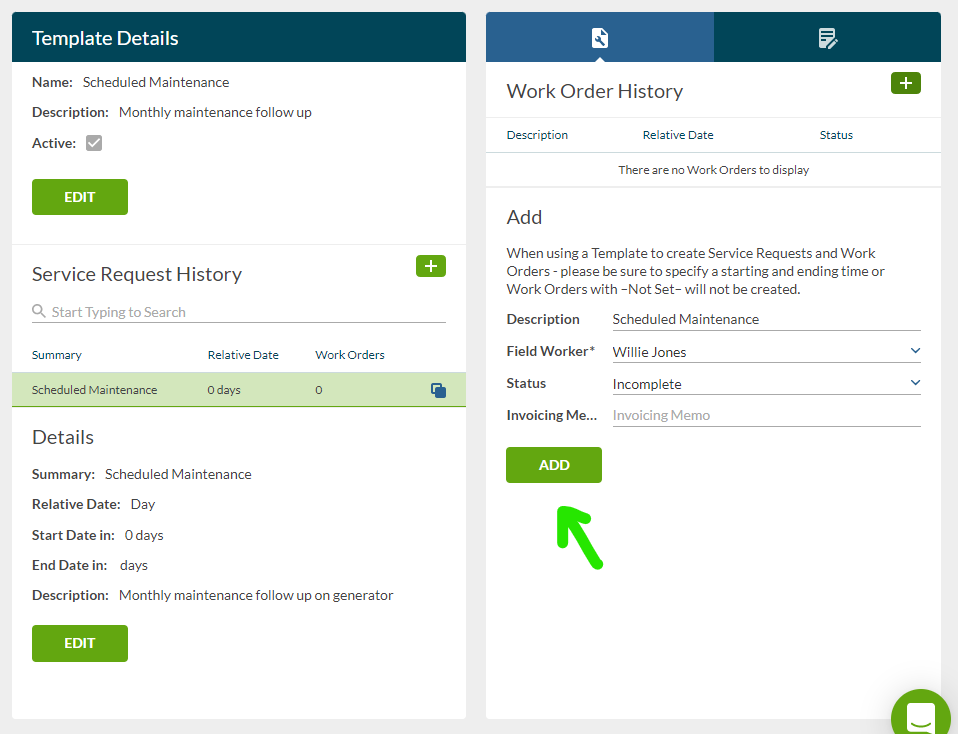
For each Work Order you add, you will be able to customize the Description, choose a particular Field Worker who will complete the Work Order (for any status except Unassigned), choose the default Status of the Work Order, choose the Relative Date and a Time(optional) for the Work Order to occur, and any Invoicing Memo notes you would like to include.

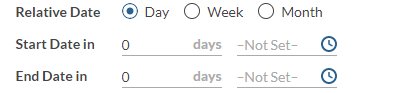
RELATIVE DATES
Templates in RazorSync utilize Relative Dates for determining the scheduled times for both Service Requests and their Work Orders.
The Relative Date of a Service Request determine both how far from the Requested Date the Service will begin, and how long it will last. This can be determined by days, weeks, or months.
The Relative Date on Work Orders determines how far out from the Requested Date on the Service Request each Work Order will occur, and how long that Work Order will last. In addition to the relative date, you can also select a specific time for that particular Work Order to occur.
Example
With a Relative start date of 0, and a relative end date of 2 - upon creation of the Service Request from a template - the start date will be the date specified, and the end date will be the end date specified + 2.
With a Start Date of 11/22/2022, and an end date of 11/22/2022 - with the above example, the Service Request would be created for a Start date of 11/22/2022 and an end date of 11/24/2022.
After adding a new Work Order
You are able to choose any Service Items and Service Forms to be included on that particular Work Order. This will allow you to establish what is included on that Work Order whenever the Template is applied.

After adding all desired Work Orders to the Service Request, you are now ready to use your Template.
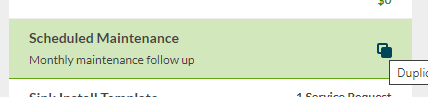
CLONING
Have services with similar workflows you would like to set up Templates for? Use the Duplicate button to create a copy of a Template to edit as desired and easily produce similar workflows.
Using Service Request Templates
Once you have created a template in your system, you are able to apply it for future Service Requests. From the CUSTOMERS page, you will see Service Request tab. Click ADD. At the top of the Service Request Details, a Template drop-down menu will appear.
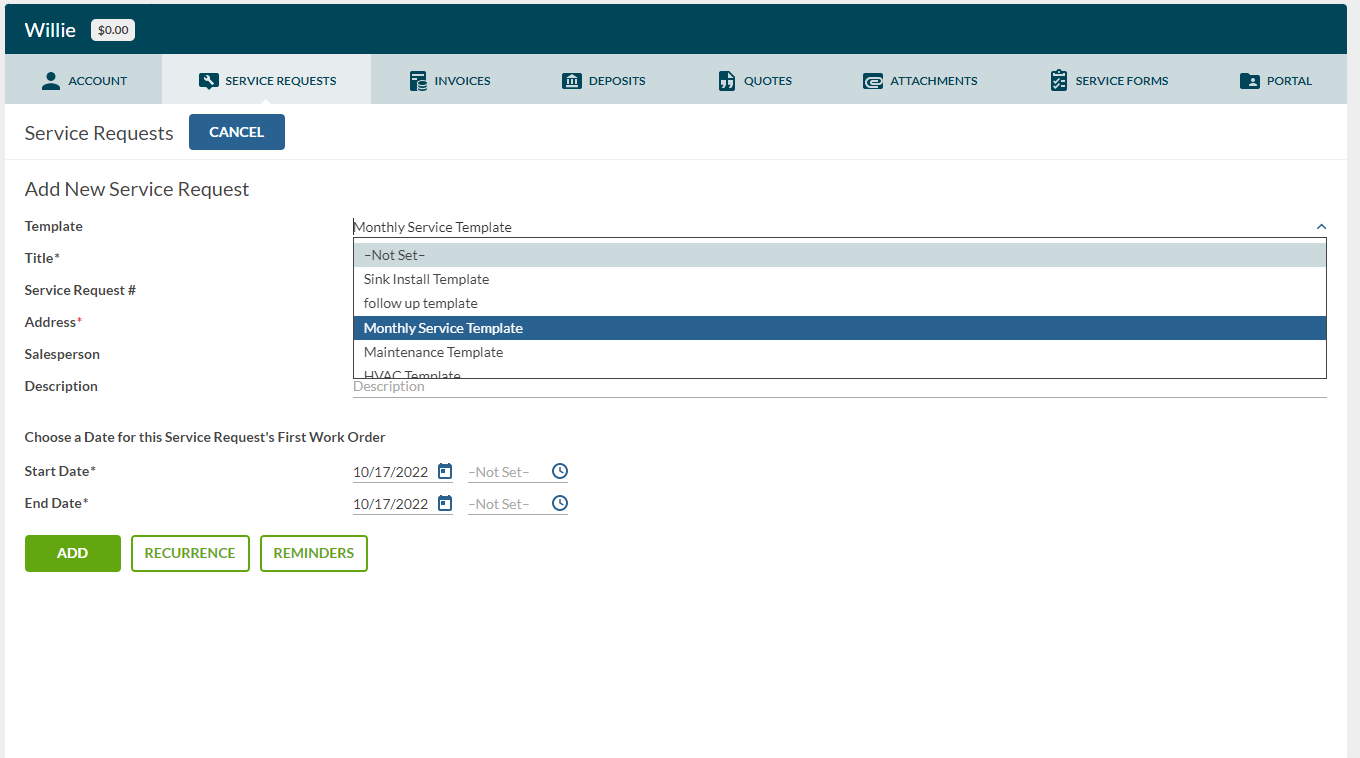
To schedule a Template for the Customer, select the appropriate template from the drop-down. This will automatically populate the Service Request fields to fit the Template you created. Select an Address, and click ADD.
Your Service Request will now have the Template applied and create any Work Order templates specified, including the selected Times, Statuses, Field Workers, Notes, Service Items, and Service Forms for each.

Other Options to Consider
- We provide you with a free trial for Templates once it is activated. After the trial expires it will be an additional $25.00 per month for Solo plan, and Team plan customers. This fee is per company, NOT per user.
Work Order Time "-Not Set-"
When creating Work Orders under a Service Request in your Template, you have the option to select a Time or leave the Time as -Not Set-.
If you select -Not Set- for any of the Times on your Work Order, that Work Order will automatically be scheduled at the Time specified on the Service Request during its creation from a Template.
For any Work Orders with the time as -Not Set-, you will need to specify a Time on the Service Request during the creation process from a Template in order for those Work Orders to appear on the Schedule.
NOTE: If you do not specify a time on the Service Request, the Work Orders with Time -Not Set- will NOT be created.