![RazorSync_Icon.png]](https://help.razorsync.com/hs-fs/hubfs/RazorSync_Icon.png?height=40&name=RazorSync_Icon.png)
Steps to Resolve:
- Open the Android app and tap the three-bar menu icon in the bottom right corner.
- Select Location Settings from the menu.
- Tap Time Zone Settings.
- Choose your preferred time zone option:
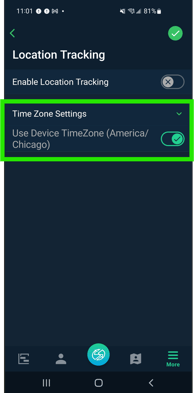
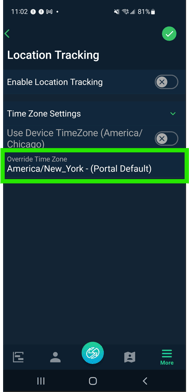
- Use Device Time Zone (Default): Keep the "Use device time zone" toggle ON to display work orders in your phone's local time zone.
- Use Portal's Default Time Zone: Toggle "Use device time zone" OFF to sync with your company's main office time zone (set in the portal under Company Settings).
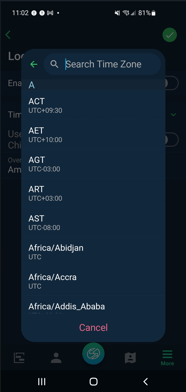
- Use a Custom Time Zone: Tap Override Time Zone, then scroll or search for the time zone you want to use, and select it.
- Tap the green check mark to save your changes.
While in a custom timezone, switch back to the default portal time zone by typing in Portal within the search bar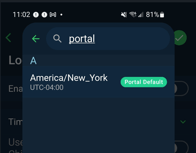
⚠️ Important Callout / Things to Know:
The app will always default to your device's local time zone when first installed. This means if your office schedules in Central Time but your phone is set to Eastern Time, all work orders will initially display in Eastern Time. If you're seeing unexpected appointment times, check this setting first to ensure it matches your preference (either your device time zone, your office's portal time zone, or a custom override).
How To Video Of Time Zone Setting