*As of Spring 2023 Intuit will be discontinuing service on QuickBooks Desktop
- For more info visit Intuit's website HERE
Settings > QuickBooks
If QuickBooks does not appear as an option, navigate to Settings > Account Payment > select QuickBooks Integration to be available in your RazorSync account.
Connect with QuickBooks Desktop
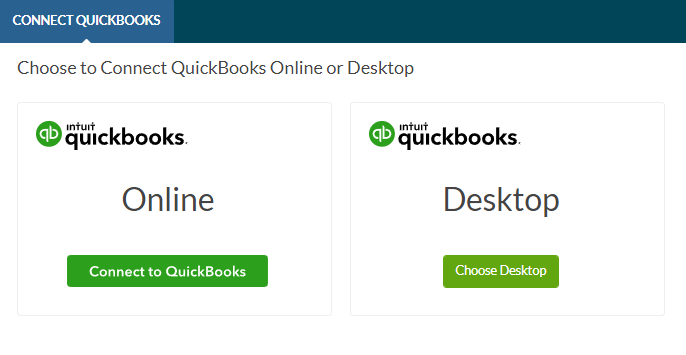
Once QuickBooks Desktop is selected as the preferred invoicing method, you may proceed with importing data (Service Items, Customers, Tax Codes, etc.) into QuickBooks Desktop. Please note that transactions within QuickBooks do not import into RazorSync.
Setup QuickBooks Desktop
- In most cases, RazorSync training is needed to prevent corrupting your QuickBooks Company Files.
- Reach out to support@razorsync.com or (877) 675-4395 to purchase and schedule QuickBooks training.
- Import Service Items
- In QuickBooks Desktop as an Admin in Single-User Mode, navigate to File > Utilities > Export > Lists to .IIF Files
- You must select ALL 3 options below:
- [X] Chart of Accounts
- [X] Item List
- [X] Sales Tax Code List
- Save
- Navigate to RazorSync to the Import Service Items page, select QuickBooks Desktop as the import method, and import this file.
- *Note: This will update your RazorSync Service Item List to reflect the item prices and descriptions in QuickBooks. If you are only looking to update tax rates, you may need to remove all Service Items but 1 from this file prior to importing. If you are unsure of this process, please contact RazorSync Support for assistance.
- Import Customer List
- In QuickBooks Desktop as an Admin in Single-User Mode, navigate to File > Utilities > Export > Lists to .IIF Files
- Select [X] Customer List
- Save
- Navigate to RazorSync to the Import Customers page, select QuickBooks Desktop as the import method, and import this file.
- Navigate to Settings > QuickBooks, and scroll towards the bottom of the page.
- Download the QuickBooks Web Connector (if needed)
- With QuickBooks Desktop open, click each link below to install the RazorSync Applications for Exporting with QuickBooks Web Connector
- Download the Invoice Export Application
- This is your primary Application, which has the ability to send invoices, payments, (and any new customers or service items associated with the invoice) to QuickBooks Desktop.
- Download the Customer Account Export Application
- This application exports your RazorSync Customer List to QuickBooks, regardless of whether the customer has any invoices or quotes to export.
- Download the Service Item Export Application
- This application exports your RazorSync Service Items List to QuickBooks, regardless of whether the service item has been used on an invoice or quote yet.
- Download the Quote Export Application
- This application exports your RazorSync Quotes. Note: if a Quote is in the status of Draft or Rejected, it will not export.
- Download the Invoice Export Application
- Choose your Export Settings
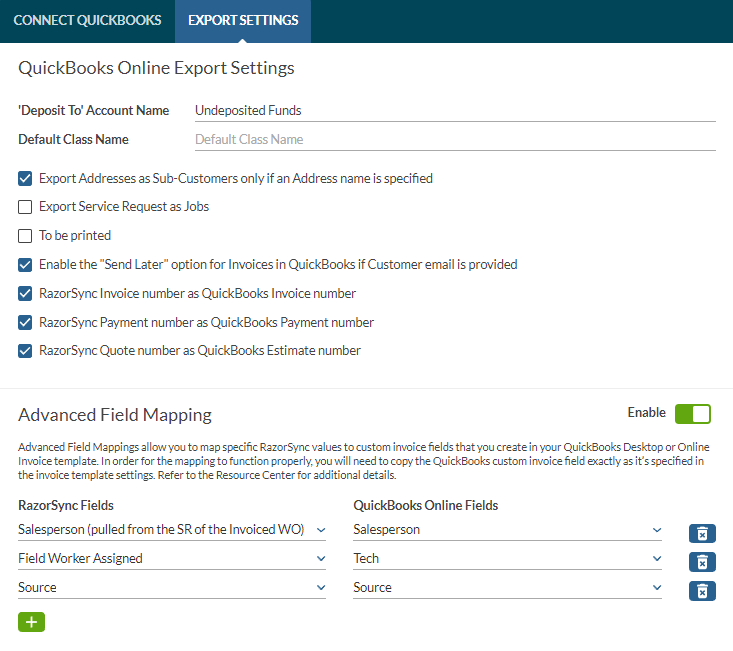
'Deposit To' Account Name - All RazorSync payments will export to this account in QuickBooks.
Default Class Name - All RazorSync Invoices will export to QuickBooks as this class.
Export Addresses as Sub-Customers only if an Address Name is specified - If you use Sub-Customers in QuickBooks, be sure to check this box so that RazorSync exports to QuickBooks Sub-Customers as well. You will need to enter an Address Name for each Service Address, and that Address Name is used to name the QuickBooks Sub-Customer.
Export Service Requests As Jobs - Uses the RazorSync Service Request Summary to create a Job in QuickBooks, which is a singular job/invoice under a QuickBooks Sub-Customer.
To Be Printed - Checks the "Print Later" checkbox found on QuickBooks Online invoices under 'Print or Preview'
Enable the "Send Later" option for Invoices in QuickBooks id Customer email is provided - Checks the "Send Later" box a the top of your QuickBooks invoices, and fills in an email address if your RazorSync Bill/Send To contact has an email address.
RazorSync Invoice Number as QuickBooks Invoice Number - When enabled, all RazorSync Invoice #'s will be used as the QuickBooks Invoice #'s when invoices are exported to QuickBooks. When disabled, QuickBooks will disregard the RazorSync Invoice # and assign the next available Invoice # to the invoice as it is sent to QuickBooks.
RazorSync Payment Number as QuickBooks Payment Number - When enabled, all RazorSync Payment #'s will be used as the QuickBooks Payment #'s when payments are exported to QuickBooks. When disabled, QuickBooks will disregard the RazorSync Payment # and assign the next available Payment # to the payment as it is sent to QuickBooks.
RazorSync 'Quote' Number as QuickBooks Estimate Number - When enabled, all RazorSync Quote #'s will be used as the QuickBooks Quote #'s when quotes are exported to QuickBooks. When disabled, QuickBooks will disregard the RazorSync Quote # and assign the next available Quote # to the quote as it is sent to QuickBooks.
Advanced Field Mapping (Optional) - QuickBooks Online allows for 3 custom fields to appear on QuickBooks Invoices. These can be customized in your QuickBooks Settings. Once customized, you may select certain RazorSync fields to map directly to one of the three QuickBooks Custom Fields.
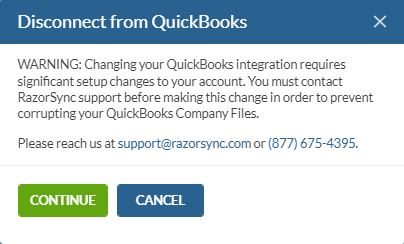
*Switching QuickBooks Versions
When switching from QuickBooks Desktop to QuickBooks Online, or vice versa, you'll now see a prompt to contact RazorSync Support.