Quick Tutorial on our new V7 mobile app currently available on iOS
Sign In

After installing the app from the App Store, when you first open the app it will take you to the login page. Enter in your Razorsync Server Name, your Username, and Password. Check the box to Remember Me and then tap on Log In.
Schedule Page
After signing into the app, the device will prompt to allow permissions, tap to Allow. Then you will be taken to the Schedule page. The Schedule page will show your scheduled jobs and allow you to access your work orders.

- Schedule button will take you to the Schedule page
- Customer button will take you to your list of Customers(*Note this list may vary based on Just in Time Settings)
- Razorsync button will allow you to Force Sync and Force Upload Attachments
- Fieldworker Map will allow you to see your tech's location
- Settings will take you to the app Settings
- Filter will allow you to filter the Schedule page by work order status or fieldworker
- Add Button will let you add a Service Request or Task
Tap on a day to change the date at the top or swipe to change weeks. You can drag down at the top to go into month view.
Work Order View

To view work order details tap on the work order status on left column.
To view Service Request details, tap on the description on right column.
The 3 dots button will also give you quick access to call the customer, email report and directions to the job location
Service Request Details
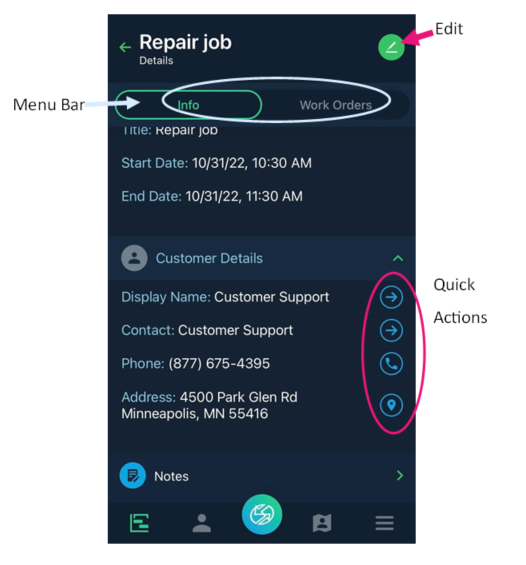
- Menu bar will let you toggle between Service Request Details and Work Orders. The Work Order section will let you add or modify work orders already existing in this service request
- Edit will let you edit the Service Request Details
- Quick Actions in the Customer Details will take you to the Customer Profile or the Contact Details for that customer. Also will allow you to call the customer directly via the Phone button
Work Order details
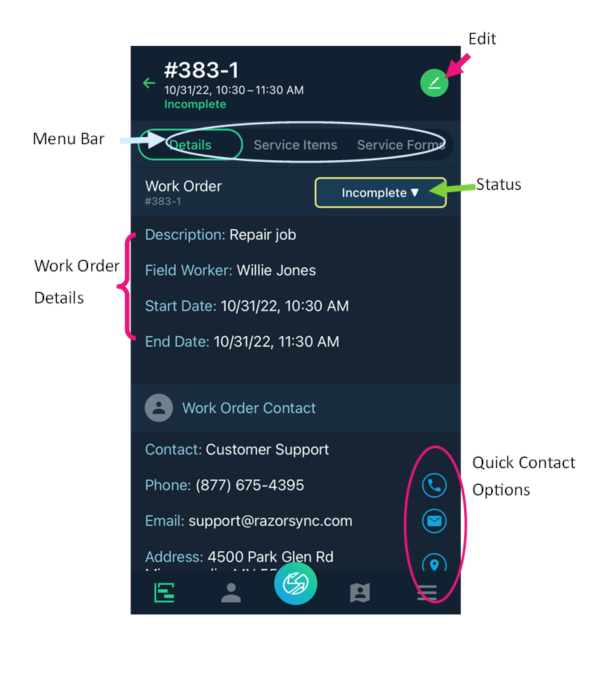
- Menu bar allows you to switch between Work Order Details, Service Items, Service Forms, Attachments, Notes, Quotes, and Invoices associated with the work order. Slide to scroll across the options and tap to select
- Edit will allow you to edit the work order Start Date and Time, Work Order Status, and Assigned Field Worker, and Invoicing Memo
- Status allows you to quickly change the status.
If the work order is Unassigned, changing the status here will automatically self-assign the work order to you.
If you want to assign this to another Field Worker tap the Edit button (green pencil icon) in the upper right hand corner, change the status to Incomplete, and then you will see the Field Worker category pop up, simply tap the drop down menu to pick a Field Worker and then hit the check mark in the top right corner to save.
- Work Order details will display the start date, time, and assigned worker for the work order
- Work Order Contact will display the associated contact and give you Quick Contact options to call or email the associated contact. As well a option to open their address in the Map application for directions to the job.
Work Order Service Items
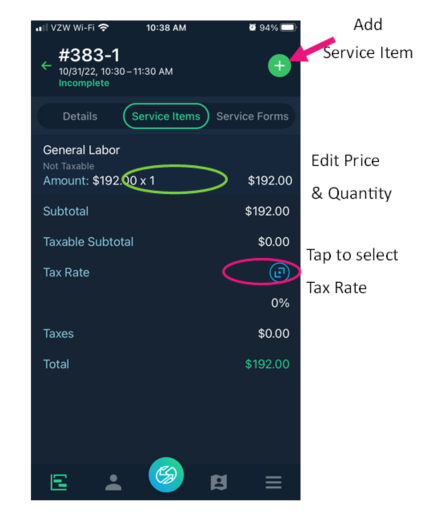
Tap on Service Items at the top of the work order details to access service items in the work order
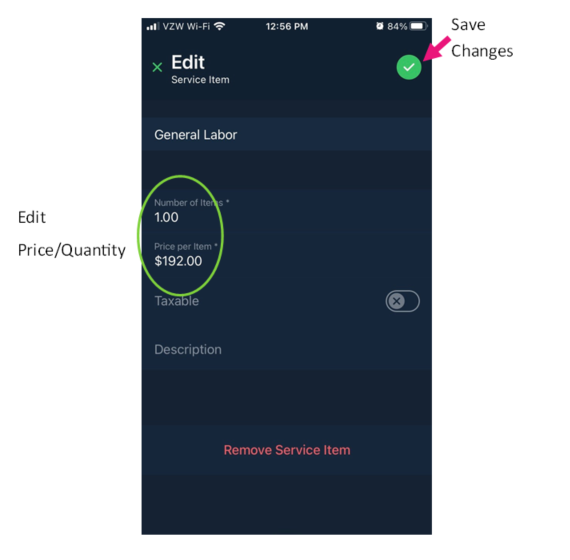
- Add button will allow you to add service items to the work order. Tap on this button, select the item, adjust the amount and price. Then tap on the check mark on the top right to finish.
- Price/Quantity Tap here to edit the existing price and quantity if it is different than the default price set. Remember to tap on the checkmark to save your changes.
Work Order Service Form
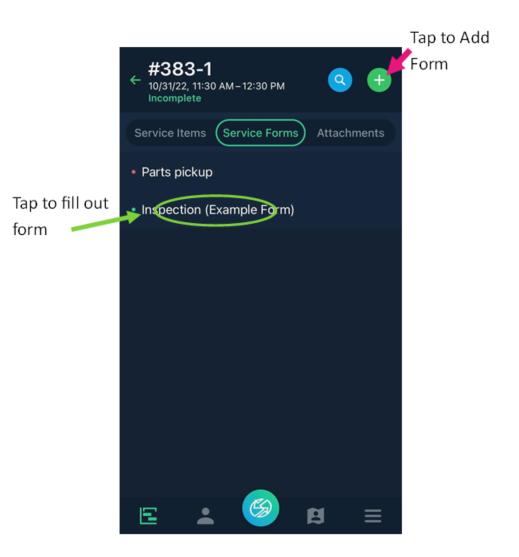
- Tap on the Service form to edit.
- Tap on the green checkmark to save what you have entered in the service form.
Work Order Attachments
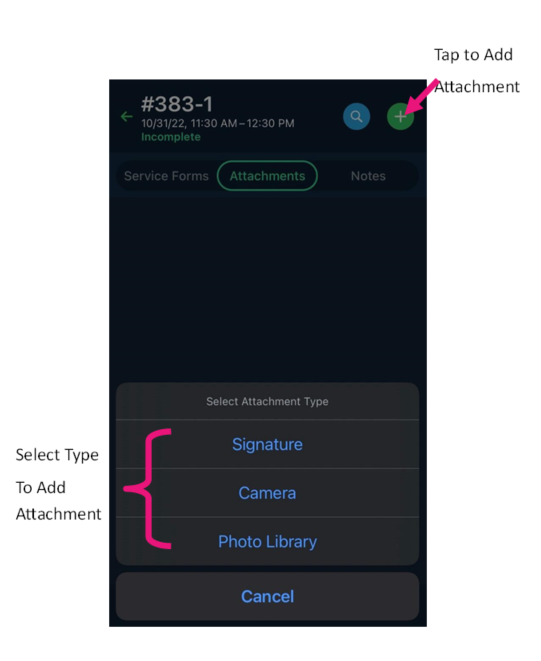
- In a Work Order, slide the menu bar at the top over and tap on Attachments to add an attachment.
- Tap the Add (+) Icon, then select from Signature, Camera, or Photo Library
Signature will allow your field workers to capture a customers signature while in the field

Quote a Work Order

- To Quote a work order, slide the menu bar to the Quote section
- Tap on the green plus button to create Quote
- Enter in Quote name in the Summary Section, leave Quote ID blank.
- Click the green checkmark to create
Synchronization Settings
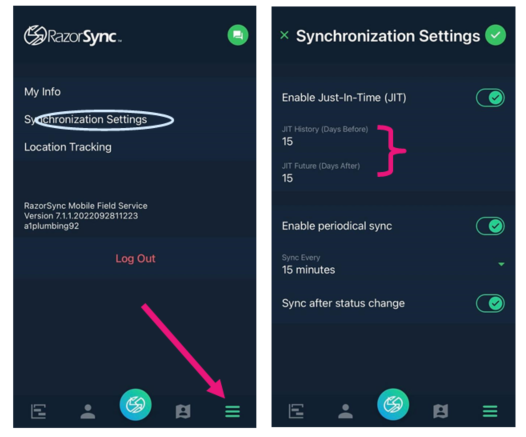
Synchronization Settings can effect what content is loaded into the app. With Just In Time Settings, it will load work orders, customers, and other content based on the days before and days after set in this section.