Settings > Users
Add Users
In your list of Users, click the {+] symbol

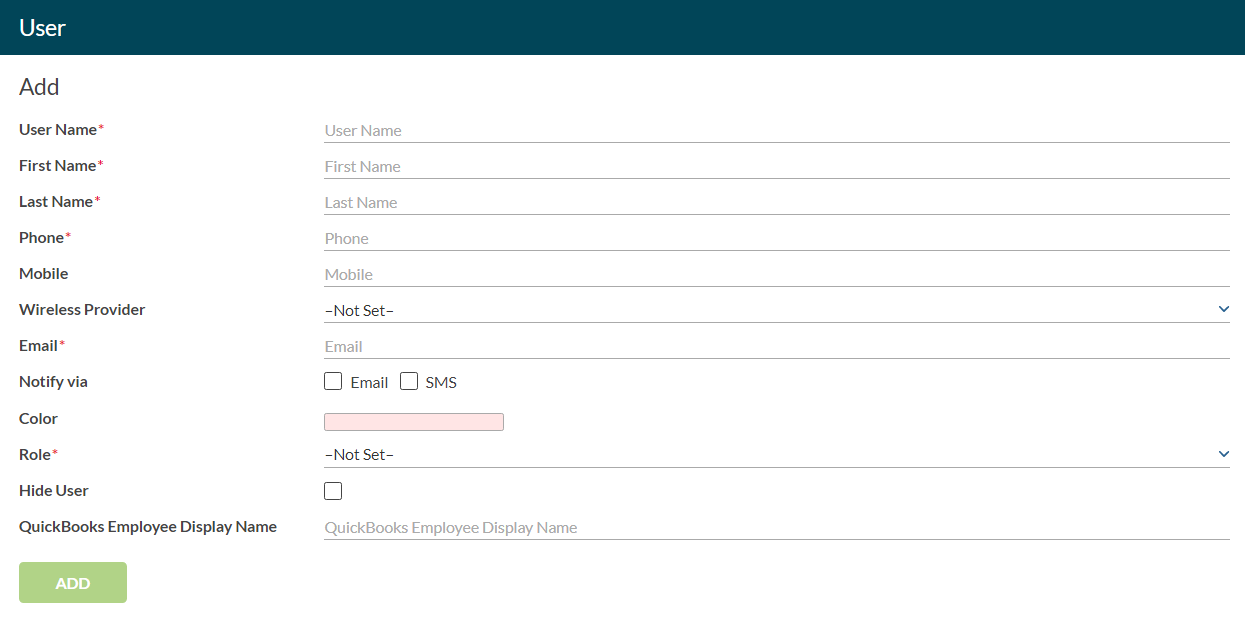
Complete the form above to create a new user. Fields with a red * symbol are required.
Notify Via Email or SMS - This is used for notifications. The Wireless provider must match the individuals phone carrier in order to receive SMS notifications.
Color - Displays on the Schedule and the Field Workers Map to help indicate a particular user.
Role - Admin/User/Support.
Admin Roles-Can access Settings, Reports, and are able to delete customers, work orders, and other items within Razorsync.
User Roles-Are not able to access Settings, Reports, or delete things within Razorsync. Their ability to see customers, work orders, and invoice can be controlled via workflow settings
Support Roles-Have the ability to schedule work orders but can't be assigned work orders. Also not able to view the schedule page.
In short, Admin Roles have the most access where as Support roles are the most limited role.
Hide User - This option allows you to hide users from the Schedule, Map, and Time Card Reports.
QuickBooks Employee Display Name - Used for mapping employee information to QuickBooks, such as Time Cards.
Note: Each Pricing Plan includes a set number of users. Each active user beyond what's included in your plan will incur an additional cost, which can be paid monthly or annually.
Edit Users
In your list of Users, select the User you would like to Edit, and adjust the information accordingly.
Note: Changing the User Name will require the user to re-login.
Deactivate Users
To deactivate a user, click on the users name from the list, and then click EDIT > DEACTIVATE
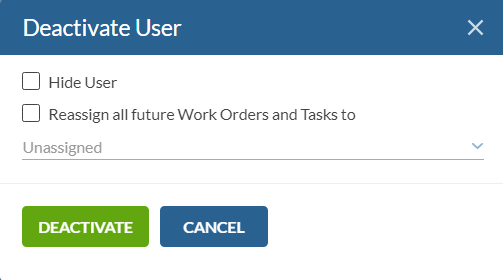
While deactivating the user, you'll see the prompt above which allows you the option to reassign all future Work Orders and Tasks from this user to another user. Simply select another user from the drop-down menu, or leave it set to Unassigned if you'd prefer.
Once a User is deactivated, you may also Hide the user from the Timeline, Map, and Time Card Reports.
*Note: Users cannot be permanently deleted, as that will impact the historical data the user is associated with, such as assigned Work Orders and Tasks, User Added Notes, etc. The recommended approach is to deactivate and hide the user. As long as the user profile is inactive, it does not count towards your total number of active users.
Additional Options
Clock In/Out - Admins may assist in clocking users in/out.
Change Password - Admins may assist in changing passwords for other users. For more information, see: Password Help
Custom Schedule
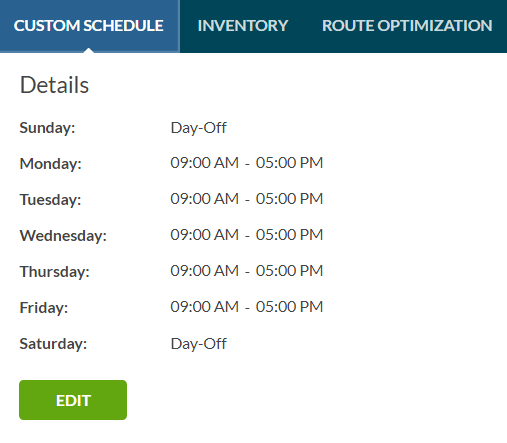
Each User can have a set weekly schedule listed. This impacts the Schedule page itself by greying out the non-working hours for each user. Work Orders and Tasks can still be assigned to the user outside of their Custom Schedule, if need be.
Inventory Management (If Applicable)

Assign Inventory directly to a user by searching for items and adding. Once the item has been added to the list, click the [...] icon to Assign quantities, download a report of that items activity, notify the user of the available quantity, or remove the assigned inventory.
When items are added to Work Orders, the available quantity reduces for the user, as well as the overall quantity on hand in your primary Service Items page.
Route Optimization (If Applicable)
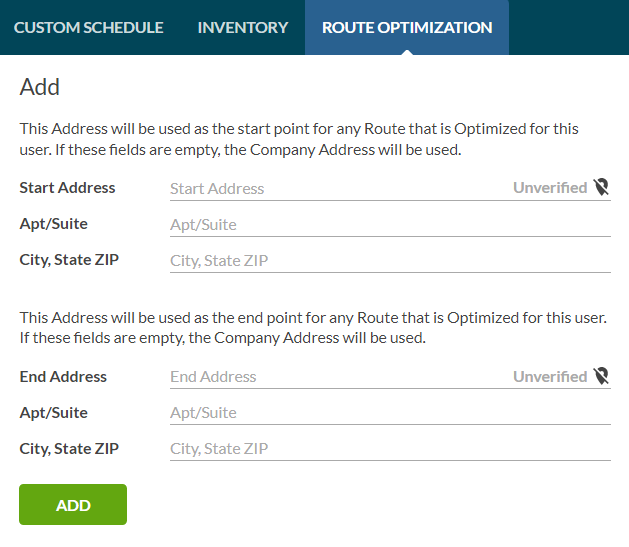
Set a Start and End location that will be used for each users optimized route. This will typically be your office address, or the users home address, depending on where the user starts and ends their day.